


I still remember the moment I first spotted a perfectly curated ear stack on a fashion blogger I follow. Her ear had this beautiful constellation of piercings lobe, helix, tragus but right in the middle sat something I could not immediately place. It was neither a lobe piercing nor a cartilage piercing sitting too high up. It was something elegantly in between. That, I later learned, was a MIDI piercing, and the moment I understood what it was, I knew I had to have one.
If you are on the same journey of curiosity and fascination, you have come to the right place. In this guide, I am going to walk you through everything I have personally learned and experienced about MIDI ear piercings from what they actually are, to how they fit into a modern ear stack, to the jewelry styles that make them truly shine.
What Exactly Is a MIDI Ear Piercing?
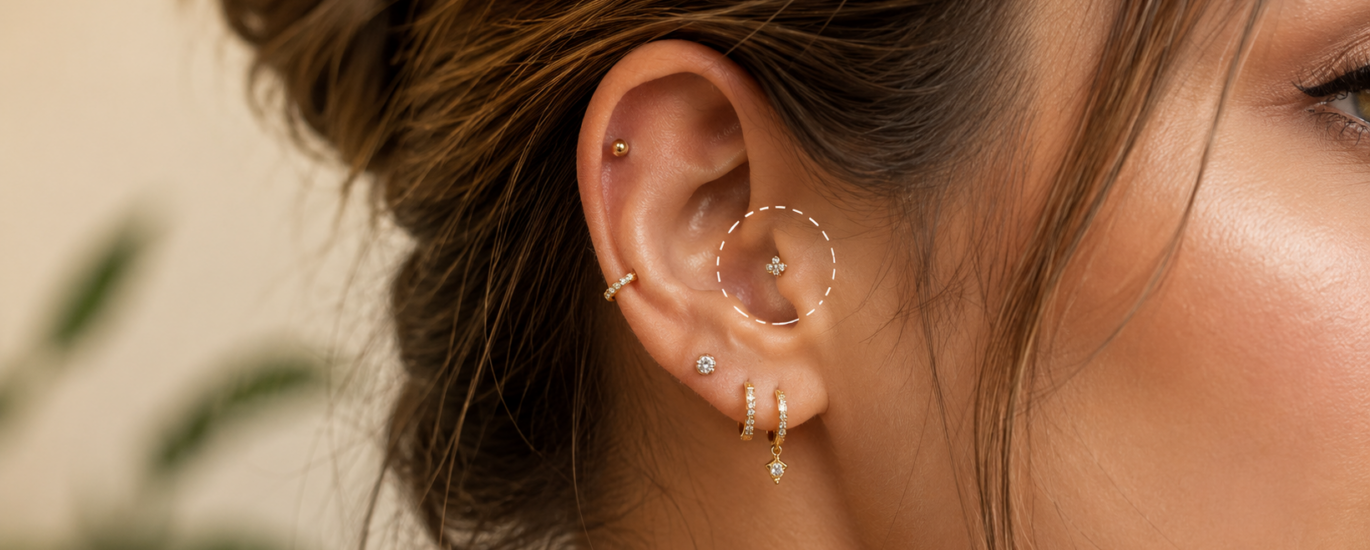
A MIDI piercing, sometimes written as “midi piercing,” sits in the middle cartilage region of the ear right above the earlobe but below the upper cartilage area. The name itself is borrowed from music terminology: just as a “midi” note sits between the bass and treble registers, this piercing occupies the middle ground of your ear anatomy.
To be more precise, it is placed in the anti-helix area or along the inner ridge of the mid-ear cartilage. It is not the same as a conch piercing, which goes deeper into the ear bowl, nor is it a helix piercing, which runs along the outer curved rim. The MIDI piercing has its own specific real estate on the ear, and that is what makes it so special.
When I got mine done, my piercer explained that the exact placement can vary slightly depending on ear anatomy. Some people have more prominent mid-cartilage ridges than others, so the positioning is always customized. That personal customization is part of what makes every MIDI piercing look slightly unique to the person wearing it.
You will also like the eyebrow tattoo stages.
How MIDI Piercing Differs From Other Cartilage Piercings
I had a helix piercing before I got my MIDI done, so I thought I knew what to expect from cartilage work. The experience was similar in some ways, but the MIDI piercing has its own set of characteristics that set it apart.
First, the placement. A helix piercing traces the outer edge of the ear, while a tragus piercing targets that small flap of cartilage near the ear canal. The MIDI piercing, on the other hand, sits in that intermediate zone closer to the face, more visible from the front, and more integrated into the overall visual flow of an ear stack.
Second, the healing process. Because cartilage has less blood flow than soft tissue like the earlobe, MIDI piercings can take anywhere from six months to a full year to fully heal. I personally experienced some tenderness for the first few months, which is completely normal. Sleeping on the side of the piercing was uncomfortable for a while, so I invested in a travel pillow with a hole in the center a small but genuinely life-changing purchase.
Third, the jewelry options. MIDI piercings support a wide range of jewelry styles that would not work as well in other cartilage placements. The mid-ear location creates a sort of visual anchor that draws the eye, making it ideal for statement pieces.
Jewelry Styles That Work Best for a MIDI Piercing
One of the reasons I fell so deeply in love with my MIDI piercing is the incredible range of jewelry that works beautifully in this placement. Let me share the styles I have personally experimented with and absolutely adored.
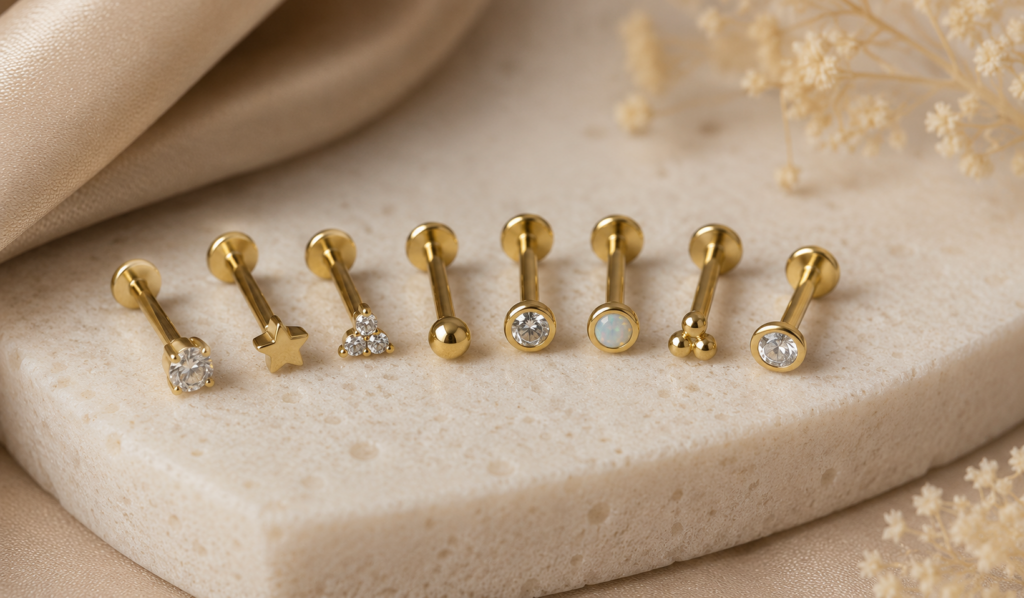
Flat Back Labret Studs — These are the gold standard for new MIDI piercings. The flat disc at the back sits flush against the cartilage, reducing irritation and snagging. I started with a simple titanium flat back stud in a rose gold finish, and it healed beautifully.
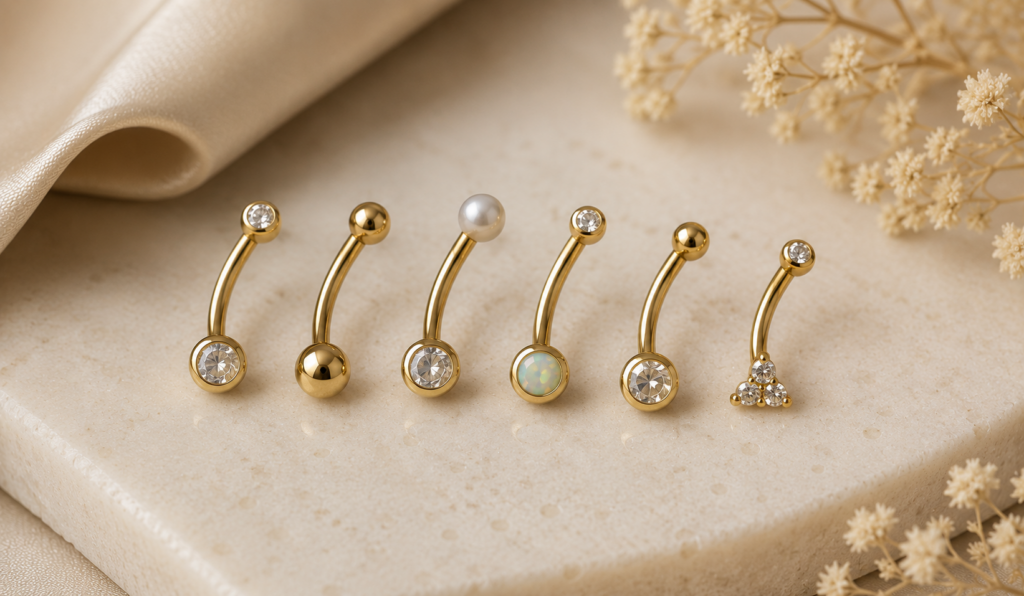
Curved Barbells — Once healed, a curved barbell adds movement and dimension to the mid-ear area. I have a delicate one with a tiny opal ball on each end, and it catches light in the most gorgeous way.
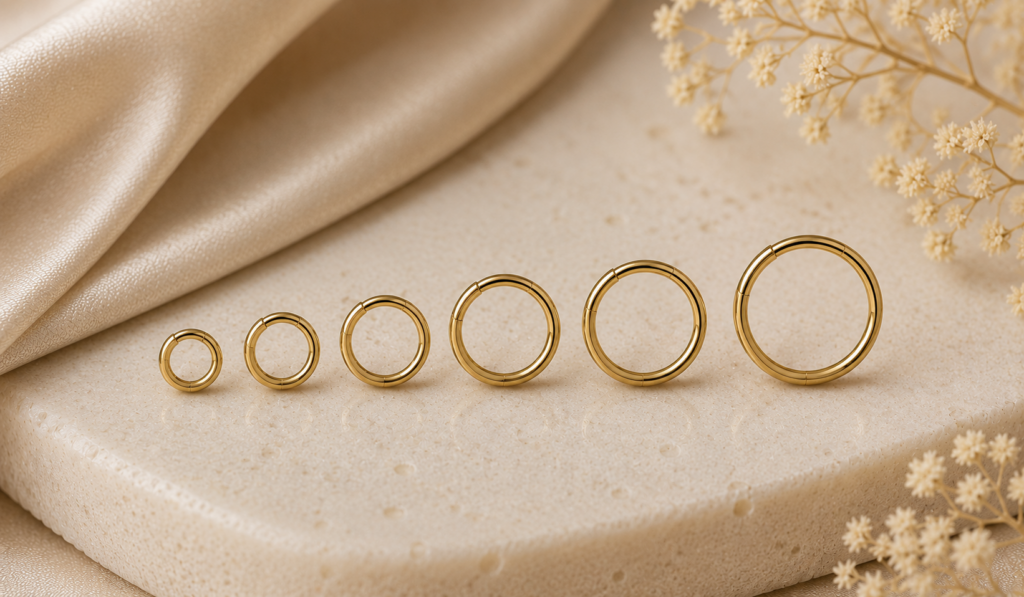
Seamless Hoops — A thin, seamless hoop in the MIDI position looks incredibly elegant. I wore a 6mm gold seamless hoop to a wedding once and received more compliments on that single piece than anything else I was wearing.
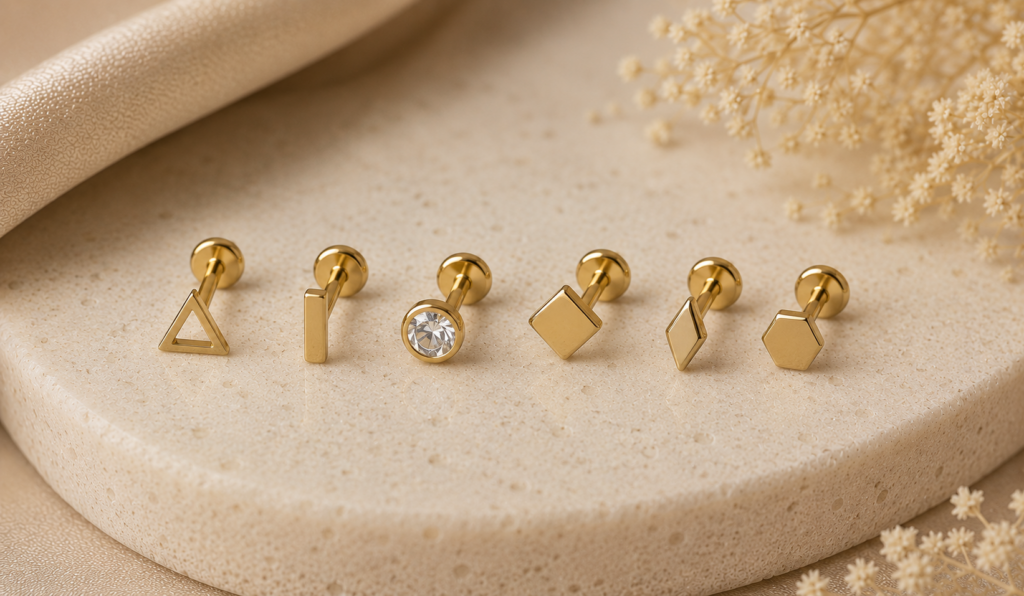
Geometric Studs — Stars, moons, hexagons, and other geometric shapes look stunning in the MIDI location because the placement gives them full visibility. I personally own a tiny crescent moon stud that I return to again and again.
When choosing jewelry, always prioritize implant-grade titanium, solid 14k or 18k gold, or implant-grade steel especially during healing. Your body will thank you for it.
Building Your Ear Stack Around a MIDI Piercing
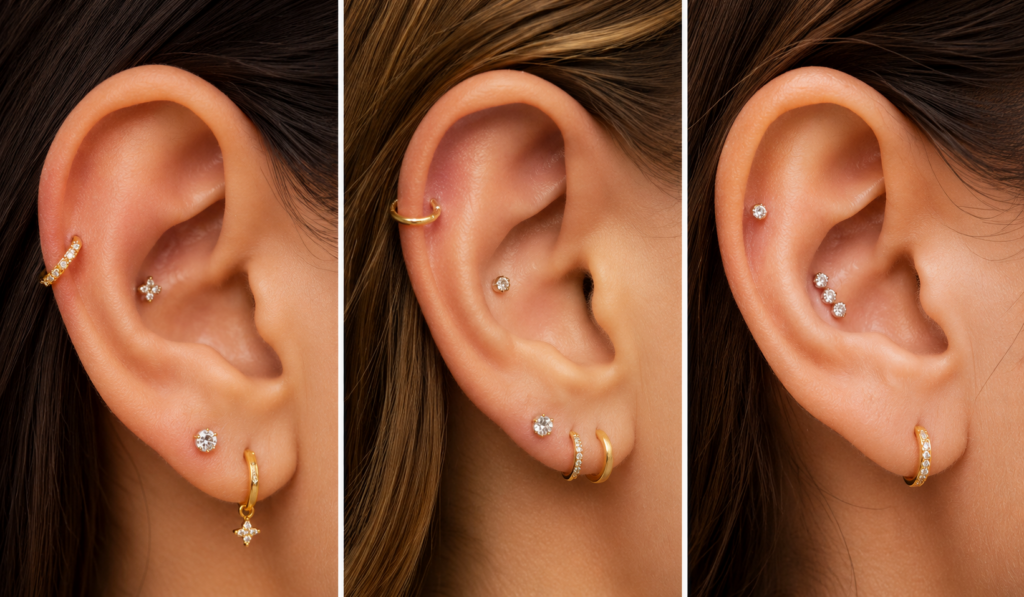
The MIDI piercing is not just a standalone statement it is one of the most powerful anchor points in a layered ear stack. When I began building my own ear stack with intention, the MIDI became the visual center around which everything else orbited.
Here is how I personally approach ear stack curation with a MIDI piercing as the focal point:
Start with the lobe. A classic single lobe piercing or even a double lobe gives your stack a grounded base. I wear a small diamond stud in my first lobe piercing to keep things classic at the foundation.
Add the MIDI as the mid-layer focal point. This is where your eye naturally travels. I chose a slightly larger, more intricate piece here a starburst flat back stud in gold to draw attention intentionally.
Complete with upper cartilage or helix. A single helix hoop or a forward helix stud at the top of the ear creates visual flow from bottom to top. The goal is a gentle upward journey of jewelry that feels cohesive rather than chaotic.
Negative space is your friend. Not every piercing location needs to be filled. I leave deliberate gaps in my stack so that each piece gets the visual breathing room it deserves.
The result, when done thoughtfully, looks like wearable art and the MIDI piercing is always the piece that makes people lean in and ask, “What is that one called?”
Aftercare Tips I Swear By for MIDI Piercing Healing
Cartilage piercings demand patience, and I will be honest with you I did not always give mine the care it needed in those early weeks. I learned some lessons the hard way, and I want to share them so you do not have to.
Saline solution is non-negotiable. I spray a sterile saline solution on my piercing twice daily, once in the morning and once before bed. I use a spray bottle specifically designed for wound care rather than a homemade salt mixture, which can be too harsh.
Hands off. The hardest rule to follow, but the most important. Touching the piercing with unwashed hands introduces bacteria. I trained myself to resist the urge by keeping my hands busy whenever I felt tempted.
Avoid submerging in water. Swimming pools, hot tubs, and even baths were avoided for the first several months. Showers are fine as long as you rinse the piercing gently with clean water.
Watch for signs of irritation bumps. I developed a small bump next to my MIDI piercing around the two-month mark. My piercer reassured me it was an irritation bump rather than an infection a common occurrence in cartilage piercings. Consistent saline care resolved it within a few weeks.
Do not change jewelry too early. I know the temptation is real, but changing jewelry before the piercing is fully healed is one of the fastest ways to set back your healing progress. I waited a full nine months before switching from my initial flat back stud.
Frequently Asked Questions About MIDI Ear Piercings
Q: How painful is a MIDI piercing compared to a lobe piercing?
A: In my experience, it is more intense than a lobe piercing but entirely manageable. The cartilage offers more resistance than soft tissue, so the sensation is sharper and lasts a moment longer. Most people describe it as a quick, pinching pressure followed by a dull throb for a few hours. The anticipation was worse than the piercing itself.
Q: How long does a MIDI piercing take to heal?
A: Full healing typically takes between six and twelve months, though surface healing can occur within the first few months. I recommend treating the piercing as if it is still healing until at least the nine-month mark, even if it feels fine before then.
Q: Can I sleep on a MIDI piercing?
A: Not comfortably in the early months. A travel pillow with a cutout or a specially designed piercing pillow makes sleeping on the opposite side much easier. I used mine nightly for the first four months.
Q: What is the best metal for a MIDI piercing?
A: Implant-grade titanium is widely considered the best option for initial piercings because it is hypoallergenic and lightweight. Solid 14k or 18k gold is also an excellent choice once the piercing is healed.
Q: Can a MIDI piercing be done on any ear shape?
A: Most ear shapes can accommodate a MIDI piercing, but the exact placement depends on your individual anatomy. A skilled, experienced piercer will assess your ear structure before making any decisions. I strongly recommend consulting a professional APP-certified piercer rather than getting it done at a general jewelry kiosk.
Q: How much does a MIDI piercing typically cost?
A: Pricing varies by location and studio, but most reputable studios charge between 40 to 80 dollars for the piercing itself, not including the cost of jewelry. Quality jewelry from a professional studio often starts around 30 to 50 dollars for implant-grade pieces.
Conclusion
Getting my MIDI piercing was one of the best style decisions I have ever made. It transformed a simple ear from something ordinary into something that genuinely reflects my personality and aesthetic. If you are on the fence, consider this your sign to go for it just do your research, choose your piercer wisely, and enjoy the beautiful journey of building an ear stack that is entirely, unmistakably yours.
You will also like the Best At-Home Laser Hair Removal Device for Smooth Skin.