your Fashion , food , lifestyle in one place
A bleach bath is one of the most underrated hair color techniques available to home colorists gentle enough to gradually lift color, precise enough to remove brassiness, and affordable enough to skip an expensive salon visit. Unlike full bleaching which hits hair with maximum intensity, a bleach bath sits comfortably in the middle ground between doing nothing and going all-in with traditional bleach. This complete guide covers real bleach bath before and after results, exactly what to expect from different hair types, a step-by-step tutorial, developer selection guidance, and the safety rules you absolutely cannot skip. Whether you’re correcting color, lifting brassiness, or going lighter gradually over multiple sessions, let’s cover everything you need to know before mixing a single drop.
IMPORTANT SAFETY NOTICE: Bleaching is a chemical process that can cause hair damage, scalp irritation, or allergic reaction. Always perform a patch test 48 hours before use. Never apply bleach to damaged, over-processed, or chemically treated hair without professional assessment. When in doubt, consult a licensed hairstylist. Individual results vary significantly based on hair type, existing color, and application technique.
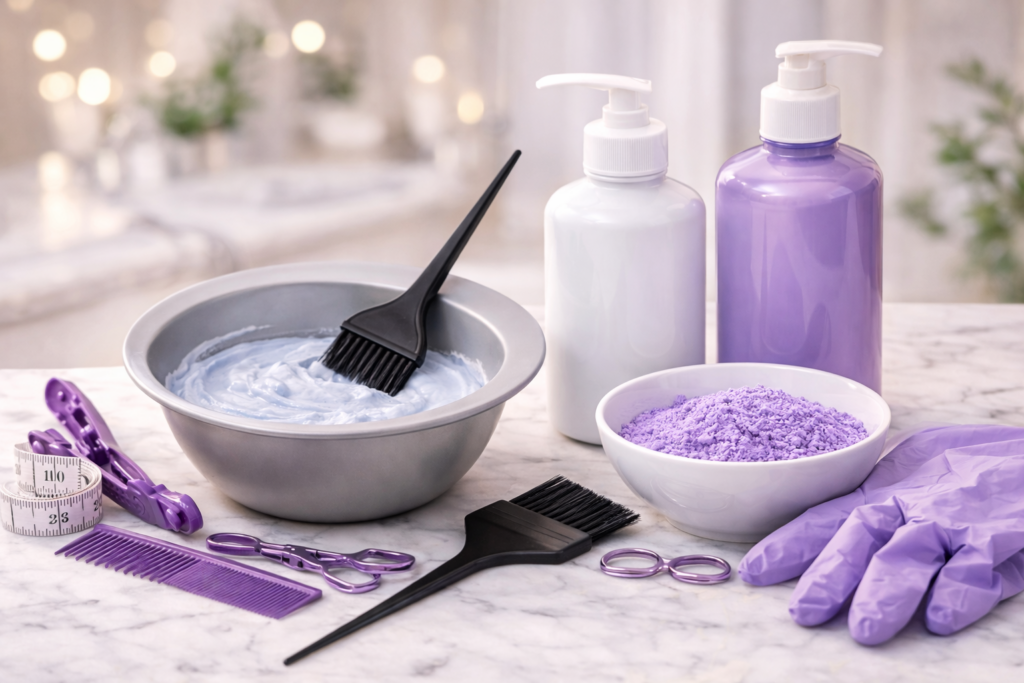
A bleach bath sometimes called a bleach wash combines three simple components: bleach powder, developer (hydrogen peroxide), and shampoo. The shampoo is the crucial ingredient that differentiates this technique from traditional bleaching. By diluting the bleach mixture, you create a gentler formula that processes more slowly, distributes more evenly across wet hair, and causes less concentrated damage than standard bleach applied to dry hair. Think of it as bleach lite all the lightening chemistry, significantly less intensity.
The Three-Part Formula: Bleach powder lifts and lightens by breaking down hair’s natural pigment. Developer activates the bleach and opens the hair cuticle to allow penetration. Shampoo dilutes the mixture and helps it distribute evenly through wet hair strands. The shampoo is genuinely what makes this method gentler than traditional bleach application.
What it does: A bleach bath hair treatment lifts 1-2 levels per session compared to 3-4 levels with full bleach, removes unwanted brassiness from faded blonde, gently lightens all-over color or refreshes highlights, and causes noticeably less damage than regular bleach when used correctly.
What it does NOT do: It doesn’t lift as dramatically as full bleach, won’t take very dark hair to platinum in a single session, and isn’t a replacement for professional color correction. Manage expectations clearly this is a gentle, gradual, controlled tool that rewards patience.
The most important thing to understand about bleach bath before and after results is that outcomes vary dramatically based on your starting hair color, condition, and chemical history. Here’s exactly what to expect for each common starting point.
You will also like the Straight Hair Haircuts for Guys.
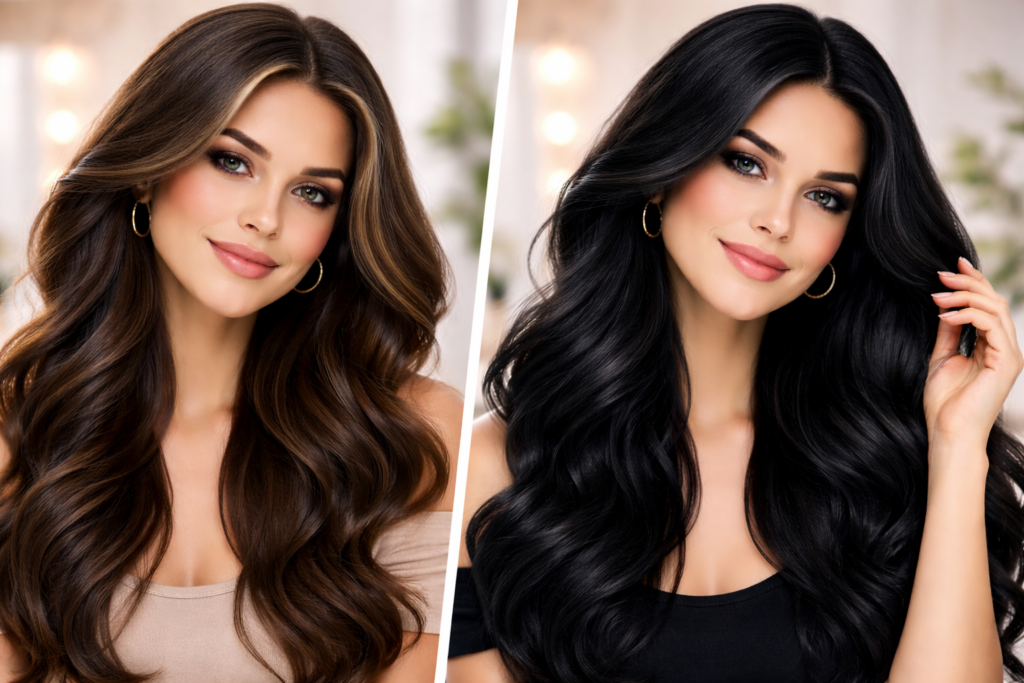
Before: Deep, dark color with minimal natural warmth visible even in direct sunlight.
After One Session: Subtle lift of approximately 1 level only. Dark brown may shift to a slightly lighter medium brown. Orange or reddish undertones emerge as dark pigment begins lifting this is completely normal and expected chemistry at work. The change may only be noticeable in sunlight rather than indoors.
Realistic Expectation: Do not expect blonde results after one bleach bath on black hair. Achieving significant lift requires 3-5 sessions spaced at minimum 2 weeks apart. Multiple gentle sessions beat one aggressive full bleach treatment for both hair health and predictability. Patience is not optional here it’s protective.
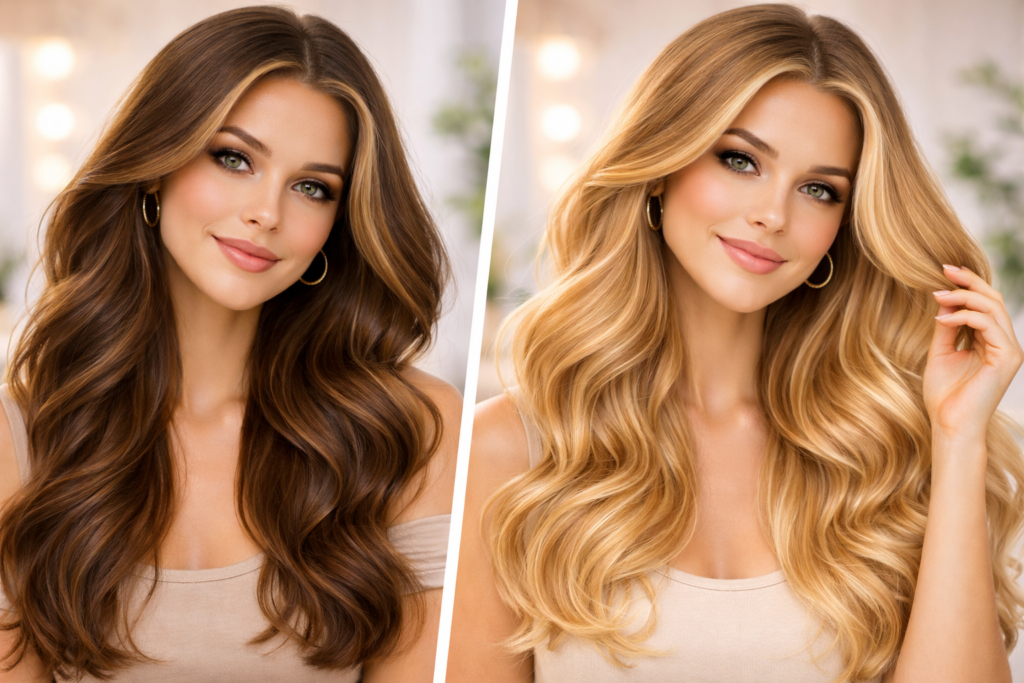
Before: Natural or dyed medium brown with moderate color depth.
After One Session: Noticeable lift of 1-2 levels. Warm caramel tones emerge as pigment lifts. Hair looks sun-kissed, warmer, and visibly lighter a genuinely satisfying result for one session. Brassiness may initially increase before toning.
Realistic Expectation: Medium blonde is achievable over 2-3 sessions with consistent approach. Natural medium brown lifts more predictably than dyed medium brown. Results appear more natural than full bleaching and grow out more gracefully. This is the sweet spot for bleach bath technique most people find the most satisfying results starting from this point.
Before: Light natural or dyed color with some existing warmth already present.
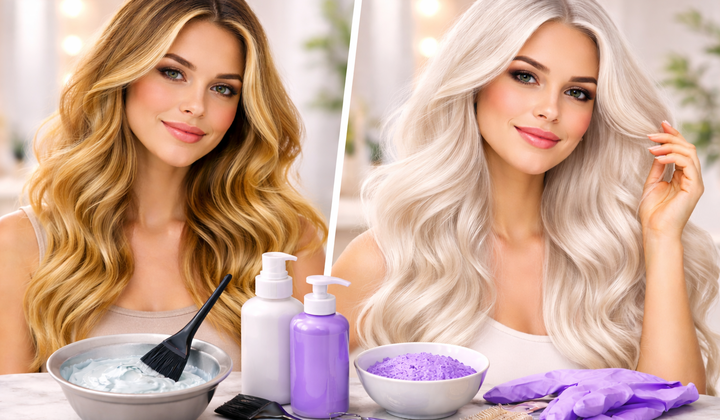
After One Session: Visible lift toward medium blonde with significant golden or brassy tones. Near-blonde results are possible in one session on natural hair with healthy condition.
Realistic Expectation: Blonde goals are often achievable in just 1-2 sessions from this starting point. Toning is required after lifting to neutralize brassiness and achieve the clean, cool blonde most people want. Existing dye may lift unevenly compared to natural hair. Natural light brown is genuinely the ideal starting point for bleach bath technique.
Before: Faded blonde, brassy, or yellow-toned previously bleached hair that needs refreshing.
After One Session: Very effective for refreshing faded lightness and removing stubborn brassiness. Can lift another partial level if needed. However, this category carries the highest risk previously bleached hair is already structurally compromised.
Realistic Expectation: Excellent for maintenance between salon appointments. Does not repair previously damaged bleached hair. May cause significant additional damage if hair is already compromised from previous treatments. The strand test is absolutely critical for this category do not skip it under any circumstances.
Before: Semi-permanent or permanent artificial color of any shade.
After One Session: Fades artificial color 1-3 shades depending on dye type and age. Semi-permanent color fades significantly (excellent for gradual removal). Permanent dye fades more slowly and gradually. Vibrant fashion colors like red, blue, or green may turn orange, muddy, or unexpected intermediate shades during removal this is completely normal chemistry, not a mistake.
Realistic Expectation: Great for gradual color removal before applying a new color. Multiple sessions are needed for complete color removal. Professional color correction may still be necessary for optimal final results. Color removal is a process, not a single-step solution.
REALISTIC LIFT EXPECTATIONS:
Black hair: 0.5-1 level per session
Dark brown: 1-1.5 levels per session
Medium brown: 1.5-2 levels per session
Light brown: 2-2.5 levels per session
Blonde/bleached: Refresh and tone only
Space sessions minimum 2 weeks apart
You’re a good candidate if you have natural or minimally processed hair, want gradual and controlled lightening over multiple sessions, are trying to remove faded semi-permanent color, want to refresh brassy blonde between salon visits, or are taking dark hair lighter gradually in a hair-healthy way. Healthy, non-damaged hair that passes the strand test is the foundation of a successful bleach bath experience.
Previously bleached hair, chemically relaxed hair, colored hair with unpredictable or unknown history, and fine or thin hair (which is inherently more damage-prone) all fall into the caution category. Perform the strand test without exception caution-category users need it most urgently.
Do not bleach bath hair that snaps or breaks easily from existing damage or over-processing. Avoid if recently chemically straightened or permed within the past 2-3 months. Never apply to scalp burns, irritation, or open wounds. Anyone with known allergies to peroxide or bleach components should avoid entirely. Pregnant or breastfeeding individuals should consult a doctor before any chemical hair process. If hair fails the strand test by disintegrating or breaking excessively, stop immediately hair lightening at home is not appropriate for that hair’s current condition.
Color correcting from heavy or multiple overlapping dye applications genuinely needs professional expertise. Starting from black box dye with metallic salts is better handled professionally. History of allergic reactions to hair chemicals is a clear signal to seek professional assessment. Some situations simply require a licensed hairstylist’s knowledge and tools.
Essential Chemicals: Bleach powder (off-scalp bleach is strongly recommended), developer in Vol 10, 20, or 30 (see guide below), clarifying or fragrance-free regular shampoo, purple or blue shampoo for post-toning if going blonde, and deep conditioning treatment or bond builder.
Application Tools: Non-metallic plastic mixing bowl (never metal), tinting brush or applicator, sectioning clips, shower cap or plastic wrap, timer (absolutely non-negotiable), gloves worn from start to finish, old towel or cape (bleach permanently damages fabric), and petroleum jelly for hairline and ear protection.
Safety Items: Patch test materials ready 48 hours before (small amount on inner elbow), strand test section selected and prepared, and a well-ventilated space with an open window and fan running. Never mix or apply bleach in an enclosed space without adequate airflow chemical fumes are a genuine health concern.
Post-Treatment Essentials: Sulfate-free shampoo, an intense conditioning mask, leave-in conditioner, and a bond repair treatment such as Olaplex, K18, or a similar product. Have aftercare ready before you begin don’t improvise post-bleach care while your hair is processing.
Perform a patch test by mixing a small amount of bleach and applying it to your inner elbow. Wait 48 full hours and observe for any allergic reaction including redness, itching, hives, or swelling. Do not skip this step under any circumstances. An allergic reaction during full application is a medical emergency that 30 minutes of testing prevents entirely.
Select a small, hidden section of hair from underneath your hair where it won’t be visible. Perform the complete bleach bath process on that one strand and document your results. Check for lift level, hair condition after rinsing, and any breakage risk signals. The strand test predicts your real results with remarkable accuracy never skip it on dark or previously colored hair.
Wash hair with clarifying shampoo the day before (not the same day) to remove product buildup without stripping protective scalp oils. Towel dry until damp but definitely not dripping. Apply petroleum jelly carefully along your hairline, ears, and neck. Put on your gloves before touching any bleach mixture. Open windows and turn on a fan for adequate ventilation throughout the entire process.
Standard Bleach Bath Ratio:
Mix in a non-metallic bowl until you achieve a creamy, completely lump-free consistency. More shampoo creates a milder result; less shampoo increases lifting power. Mix only what you’ll use immediately do not store mixed bleach.
Section damp hair into four quarters for organized, systematic coverage. Apply mixture section by section using a tinting brush working quickly but with attention to even distribution. Apply to mid-lengths and ends first, then roots last. Roots process faster due to body heat from the scalp, so they need less time than the rest of your hair. Even coverage is critical streaky application creates streaky, uneven results that are difficult to correct.
Cover hair with a shower cap to keep warmth in and prevent the mixture from drying out prematurely. Set your timer based on developer strength. Check hair every 5 minutes by wiping a small section clean to assess the lift level. Never leave and forget your bleach bath it left unmonitored too long causes serious, permanent damage.
TIMING RULES:
Vol 10: Maximum 20 minutes
Vol 20: Maximum 15-20 minutes
Vol 30: Maximum 10-15 minutes
Check every: 5 minutes without exception
At each 5-minute check, wipe a small section clean and assess the color. Rinse thoroughly when you reach your desired lift level OR when the time limit is reached whichever comes first. Rinse with cool water until the water runs completely clear. Apply your deep conditioner immediately and leave it for 5-10 minutes before a final rinse. Cool water seals the hair cuticle and reduces any further unnecessary lifting.
If you’ve lifted to blonde territory, follow immediately with purple or blue shampoo left on for 3-5 minutes to neutralize brassiness. For more precise toning results, apply a professional toner mixed with Vol 10 developer. Toning is genuinely what takes bleached hair from brassy orange-yellow to beautiful, clean blonde.
Vol 10 Developer (3% peroxide): Weakest option providing minimal lift of 0.5-1 level. Best for very fine or fragile hair, already-blonde hair, and situations requiring tone correction only. Maximum 20 minutes processing. The safest choice for sensitive scalps, delicate hair, and previously bleached hair.
Vol 20 Developer (6% peroxide): Standard choice delivering moderate lift of 1-2 levels. Best for normal, healthy hair at medium to light brown starting color. Maximum 15-20 minutes. The most recommended starting developer for anyone learning how to bleach bath hair for the first time. When uncertain which developer to use, Vol 20 is your default.
Vol 30 Developer (9% peroxide): Strong option providing 2-3 levels of lift. Best for stubborn dark hair in healthy, thick condition only. Maximum 10-15 minutes (shorter processing time due to strength). Not appropriate for damaged, thin, or fine hair under any circumstances. Use with genuine caution Vol 30 in a bleach bath remains a powerful chemical process.
Vol 40 Developer: Not recommended for bleach baths under any circumstances. Too damaging in this diluted application and intended for professional use in controlled salon settings only. Skip Vol 40 entirely for this technique.
Always perform a patch test 48 hours before every single session even if you’ve used bleach before. Sensitivities can develop at any time. Perform a strand test on a hidden hair section without exception. Ensure adequate ventilation with open windows. Wear gloves from before you touch the mixing bowl until you rinse out completely. Keep bleach away from eyes entirely. Apply petroleum jelly to your hairline, ears, and neck. Prepare everything before mixing anything. Preparation is your safety net.
Never apply to broken skin or scalp wounds. Never exceed the time limit for your developer strength. Never leave hair unmonitored during processing. Never mix in a metallic bowl due to chemical reaction risk. Never inhale directly over the mixing bowl during mixing. Never apply to hair that is dripping wet rather than damp. Set a timer. Check every 5 minutes. Never wing the timing.
Scalp burning: Rinse immediately with cool water do not wait even one minute. A tingling sensation is normal; burning is not. Eyes exposed: Flush with clean water continuously for 15 minutes and seek medical help. Allergic reaction symptoms including hives, swelling, or difficulty breathing: Call emergency services immediately. Hair breaking or dissolving during application: Rinse now, stop the process completely, and assess damage before considering any next step. Your safety is always more important than the color result.
Stop if hair feels mushy, gummy, or unusually soft when wet. Stop if scalp is burning rather than mildly tingling. Stop if a visible allergic reaction appears on skin. Stop when the time limit is reached regardless of whether you’ve achieved your desired result. Unfinished lightening is fixable with patience. Severely damaged or chemically burned hair is not.
Immediately After: Rinse thoroughly with cool water until water runs completely clear. Apply your deep conditioning mask immediately and leave it for a full 5-10 minutes before the final rinse. Pat hair dry gently rather than rubbing rough towel drying on chemically processed hair causes unnecessary breakage. Air dry whenever possible rather than immediately reaching for heat tools.
First Week After: Wash hair only 2-3 times total to preserve both lift and moisture. Use exclusively sulfate-free, color-safe shampoo that won’t strip the hair further. Deep condition with every single wash. Apply a bond treatment like Olaplex, K18, or Wellaplex to rebuild broken disulfide bonds from the chemical process. Use leave-in conditioner daily for moisture maintenance. Avoid all heat styling for a minimum of 48 hours. Your hair just underwent a chemical process treat it with appropriate gentleness.
Ongoing Maintenance: Wait a minimum of 2 weeks before considering any repeat bleach bath many professionals recommend 4 weeks for optimal hair health recovery. Use purple shampoo once weekly if maintaining blonde to prevent brassiness creep. Continue weekly deep conditioning masks as ongoing bleached hair care practice. Trim regularly to remove brittle ends before they split further up the shaft. Apply bond treatment every 2-3 weeks as ongoing maintenance.
Signs of Over-Processing: Hair that feels gummy or unusually stretchy when wet, excessive breakage during gentle combing, extreme dryness that persists despite conditioning, and loss of elasticity (hair that doesn’t spring back when stretched gently) all indicate over-processing. These signs mean stop all chemical processes, treat intensively with bond-building products, and wait until hair recovers before considering anything further.
1. Skipping the Strand Test — The single most common and most costly mistake home colorists make. Always test first, every time, without exception. Thirty minutes of testing genuinely saves potential months of damage and regret.
2. Using Too Strong a Developer — Vol 30 on fine, damaged, or previously bleached hair causes breakage that no conditioner repairs. Start with Vol 20 as your baseline and increase strength only when you have healthy hair and a specific reason to go stronger.
3. Applying to Dry Hair — A bleach bath absolutely must go on damp hair. Dry application fundamentally changes how the mixture processes and creates uneven, unpredictable results across different sections.
4. Leaving On Too Long — Time limits exist because chemistry doesn’t negotiate. A bleach bath left beyond maximum processing time causes chemical damage that deep conditioning cannot fix it requires cutting or growing out entirely.
5. Uneven Application — Rushing through application causes patchy, streaky, frustrating results. Take the time to work systematically section by section for even coverage throughout.
6. No Aftercare Plan — Having no bond treatment or deep conditioning mask ready when you rinse out is negligence toward your own hair. Plan and purchase aftercare before you begin mixing.
7. Repeating Too Soon — Impatient re-bleaching within the 2-week minimum window compounds chemical damage that accumulates with each session. Patience isn’t just a virtue here it’s hair preservation.
Q: How many levels can a bleach bath lift in one session?
A: On average, 1-2 levels per session depending on starting color, developer strength, and hair porosity. Dark brown can expect 1-1.5 levels with Vol 20. Light brown may lift a full 2 levels. Existing blonde is refreshed rather than dramatically lifted. Multiple sessions spaced 2 weeks apart create gradual, healthier, more controllable bleach bath results than one aggressive full bleach treatment ever does.
Q: Can I bleach bath hair that’s been colored with box dye?
A: Yes, but with important caution. Box dye often contains metallic salts that react unpredictably with bleach causing breakage or unusual color results. Perform both patch test and strand test without exception. Expect potentially uneven lifting since box dye penetrates unevenly. Color may pull red, orange, or muddy tones before lightening further this is normal. Professional color correction may ultimately be needed for optimal results.
Q: How long should I leave a bleach bath in?
A: Maximum times depend strictly on developer strength: Vol 10 up to 20 minutes; Vol 20 15-20 minutes; Vol 30 10-15 minutes. Check every 5 minutes by wiping a small section clean. Remove when you see desired lift or when time is up whichever comes first. Never exceed maximum times for any reason. Your timer is your most important tool in this entire process.
Q: Will a bleach bath damage my hair?
A: Any bleaching process causes some structural damage. A bleach bath is genuinely gentler than regular bleach but still chemically alters hair. Damage is minimized significantly by using the correct developer for your hair condition, respecting time limits absolutely, using bond treatments before and after, and spacing sessions appropriately. Severely damaged hair should not undergo bleach bathing without professional assessment first.
Q: How often can I do a bleach bath?
A: Minimum 2 weeks between sessions no exceptions to this rule. Many professional colorists recommend waiting 4 weeks for optimal hair health recovery. Over-processing from frequent bleach baths causes cumulative damage that worsens compoundingly with each rushed session. If hair feels brittle, snaps easily, or lacks elasticity after a session, wait longer and treat aggressively with bond-building products before considering another round.
Q: Does a bleach bath work on natural hair?
A: Yes natural, uncolored hair typically responds most predictably and evenly of any hair type. Natural hair without any chemical history (no color, relaxer, or perm) is the ideal bleach bath candidate. Results are most consistent and controllable on natural hair. Darker natural hair requires patience across multiple sessions; lighter natural hair can see satisfying single-session results.
Q: Should I wash my hair before a bleach bath?
A: Wash with clarifying shampoo the day before not the day of your treatment. Natural oils that accumulate provide a slight protective barrier for the scalp. Same-day washing removes those protective oils and leaves the scalp more vulnerable to chemical irritation. Hair should be clean but not freshly stripped. Towel dry to damp before applying your bleach bath mixture.
Bleach bath before and after results prove that achieving salon-worthy hair color at home is absolutely possible when approached safely, correctly, and with genuinely realistic expectations set from the beginning. This technique’s real power lies entirely in its gentleness. Gradual, controlled lightening that respects your hair’s integrity beats aggressive bleaching every single time in terms of long-term hair health and overall satisfaction with results. Always patch test 48 hours before every session. Always strand test. Respect time limits without exception. Invest seriously in aftercare products before you begin. With the right preparation, the right developer strength matched to your hair’s condition, and a patient step-by-step approach, your bleach bath hair results will speak beautifully for themselves. Take it one session at a time, care deeply for your hair between rounds, and enjoy watching your color transformation unfold safely and successfully.
You will also like the French tip nails.

Kesha Smith is a lifestyle blogger passionate about simple living, healthy habits, and everyday inspiration. On this website, you’ll find