your Fashion , food , lifestyle in one place
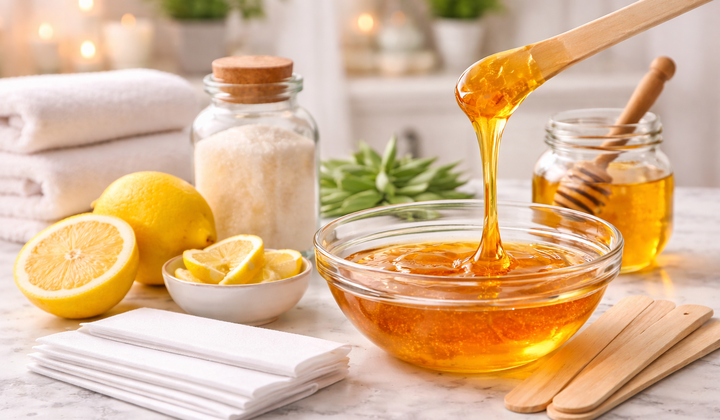
Imagine achieving salon-smooth skin using just three ingredients from your kitchen sugar, lemon juice, and water. That’s the magic of this sugar wax recipe, an ancient hair removal method that’s natural, affordable, and surprisingly effective once you master the technique. Sugar waxing, also known as sugaring, has been used for thousands of years across Persian and Egyptian civilizations for good reason it works beautifully without harsh chemicals or expensive products. This complete guide covers the perfect sugar wax recipe, step-by-step application techniques for every body area, troubleshooting common problems, and exactly how to achieve smooth, hair-free skin at home without salon visits. Let’s create your batch and discover why sugar waxing is taking over the natural beauty world!
Sugar waxing is a natural hair removal method using a sticky paste made entirely from sugar, water, and an acid like lemon juice. Also called “sugaring” or “Persian waxing” (halawa in Arabic), this ancient technique dates back to Egyptian and Persian civilizations Cleopatra reportedly used sugar waxing, which tells you just how timeless and effective this method truly is.
How It Works: The sugar paste adheres firmly to hair but not to living skin cells, making it inherently gentler than traditional wax. The paste is applied against the hair growth direction, then removed quickly in the direction of natural hair growth. This pulls hair cleanly from the root, providing 3-6 weeks of smoothness between sessions.
The Key Difference from Regular Wax: Traditional wax is applied with hair growth and pulled against it, while sugar wax does the exact opposite applied against growth, pulled with growth. Regular wax sticks aggressively to both skin and hair (more painful and irritating), while sugar wax sticks primarily to hair alone. This fundamental difference makes sugaring significantly more suitable for sensitive skin and delicate areas.
What Makes Sugar Waxing Special: The ingredients are 100% natural and edible. The mixture is completely water-soluble for easy cleanup. Everything is biodegradable and eco-friendly. When done correctly, it’s genuinely less painful than traditional waxing, and it works effectively on all body parts from legs to face.
1. All-Natural Ingredients: Just sugar, lemon juice, and water absolutely no chemicals, artificial fragrances, or mysterious ingredients. It’s safe for sensitive skin and hypoallergenic (lemon can even be omitted for extra sensitivity). You can literally eat the ingredients that’s how natural this DIY hair removal truly is.
2. Cost-Effective: An entire batch costs under $2 in ingredients and handles multiple sessions across weeks or months. No recurring expensive salon visits are required. You get the same smoothness at a fraction of the cost of professional waxing.
3. Less Painful: Because it removes hair in the natural growth direction and doesn’t stick to live skin cells, most people find it significantly less painful than strip wax. The room-temperature application (not hot) also reduces discomfort considerably.
4. Gentler on Skin: With no harsh chemicals, resins, or fragrances, sugar wax causes minimal irritation and redness. It’s suitable for sensitive areas including the face and bikini line where other methods might be too harsh.
5. Easy Cleanup: The water-soluble formula means no sticky residue that requires special oils or removers. Everything washes off completely with warm water cleanup takes seconds rather than minutes of scrubbing.
6. Longer-Lasting Results: Hair removed from the root rather than cut at the surface lasts 3-6 weeks typically. With consistent use over months, hair often grows back finer and sparser, making future sessions even easier.
7. Eco-Friendly: Biodegradable ingredients, zero plastic waste, and minimal environmental impact make this the sustainable choice for natural hair removal that aligns with eco-conscious values.
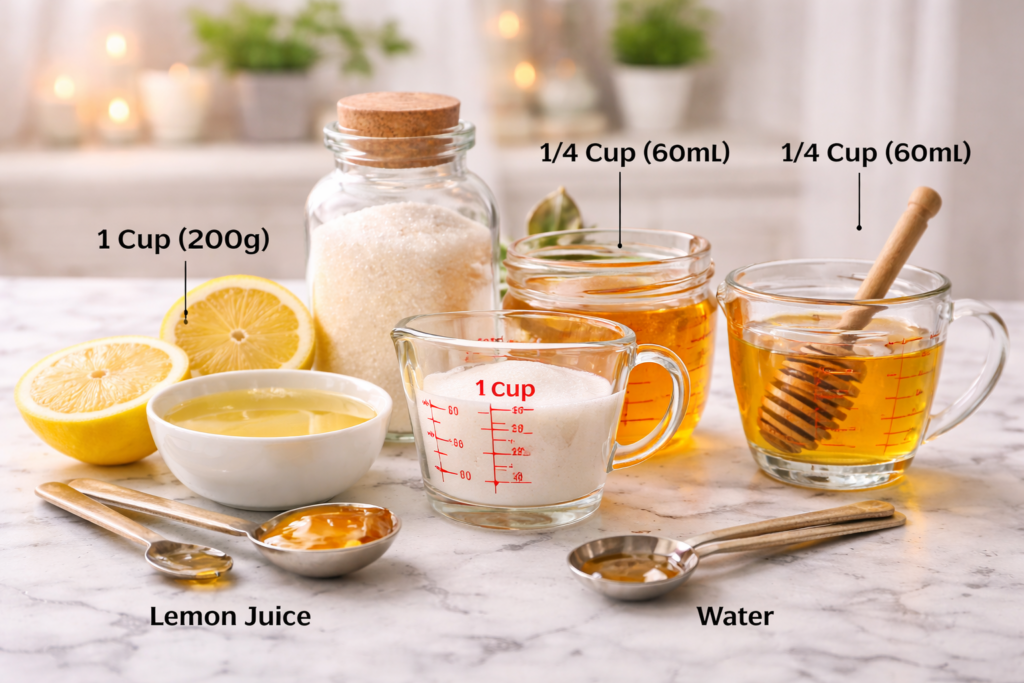
Ingredients:
Equipment Needed:
For Extra Sensitive Skin: Replace lemon juice with apple cider vinegar, or use all water with no acid. The acid helps achieve proper consistency but isn’t mandatory for those with sensitivity.
For Firmer Wax (Body Use): Reduce water to 3 tablespoons and cook slightly longer. This creates a firmer consistency that works better for larger body areas like legs.
For Softer Wax (Facial Use): Add an extra tablespoon of water and cook for slightly less time. Softer consistency works better on delicate facial areas that need gentler treatment.
Ingredient Notes: White granulated sugar works best avoid brown sugar, which doesn’t set properly. Fresh lemon juice creates clearer wax, but bottled works fine too. Distilled water gives the most consistent results. Don’t substitute honey or other sweeteners the chemistry simply doesn’t work the same way.
You will also like the Makeup styles.
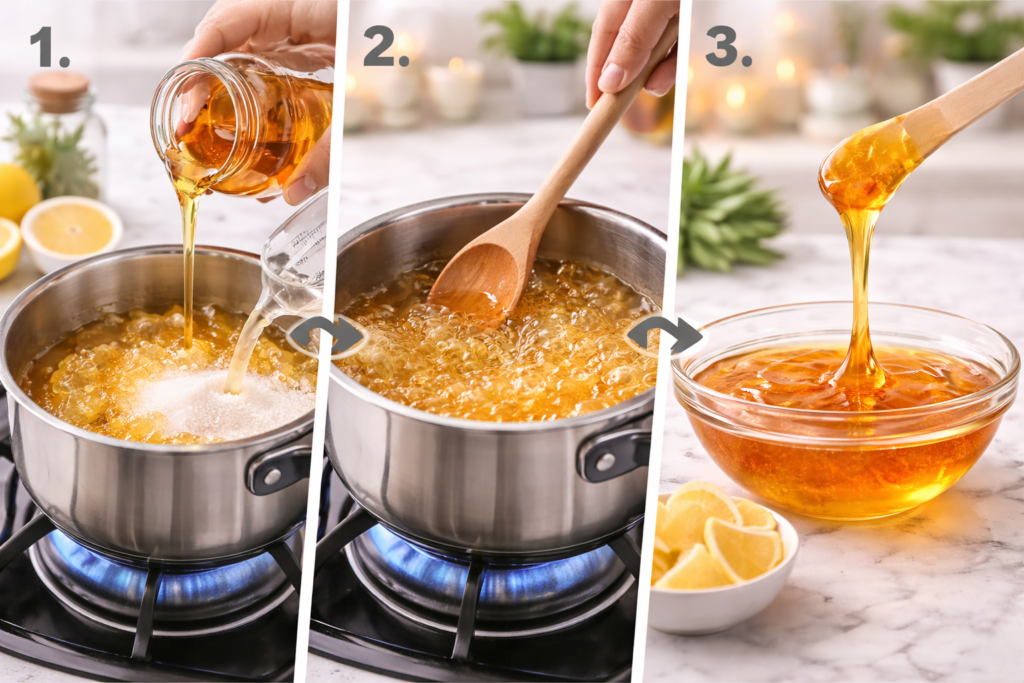
Step 1: Combine Ingredients
Add sugar, lemon juice, and water to your saucepan. Stir gently to combine everything thoroughly. Do this without heat first make sure all sugar is moistened before you begin heating to prevent burning.
Step 2: Heat on Medium
Place the pan on medium heat never high, as sugar burns easily and quickly. Stir constantly as the mixture heats. The sugar will dissolve and the mixture will start bubbling. Constant stirring prevents burning and ensures even cooking throughout.
Step 3: Watch for Color Change
The mixture progresses from clear liquid to light golden to amber or honey color. Your target is golden honey or light caramel this takes approximately 6-8 minutes. Color is your most reliable visual cue. A candy thermometer reads 250°F (121°C) at this stage, but color is actually more reliable than temperature alone.
Step 4: Test Consistency
Drop a small amount into cold water it should form a soft, pliable ball. The consistency should be moldable, not hard like candy and definitely not liquid. This is the “soft-ball stage” in candy-making terminology. Alternative test: Drop a small amount on a plate, let it cool for 30 seconds, and check if it’s thick and honey-like.
Step 5: Remove from Heat
Once you achieve that golden amber color, remove from heat immediately. The mixture continues cooking from residual heat, so don’t wait for perfect consistency while still on the stove. Pour carefully into your heat-safe container.
Step 6: Cool Completely
Let the mixture sit at room temperature for 2-3 hours. It will thicken significantly as it cools to a honey-to-putty consistency. Patience here prevents burns and allows proper thickening to occur naturally.
COOKING STAGES:
Clear liquid → Keep cooking
Light gold → Almost there
Honey/amber → PERFECT – remove from heat
Dark caramel → Overcooked, too hard
Black → Burned, discard and restart
Troubleshooting the Cook: Too runny after cooling? Reheat and cook 1-2 minutes longer. Too hard after cooling? Reheat with 1 tablespoon water and stir thoroughly. Crystallized or grainy? This means insufficient liquid or stirring after removing from heat. The good news: homemade sugar wax is forgiving you can reheat and adjust as needed.
Your Hair: Hair must be a minimum of 1/4 inch long (approximately the size of a grain of rice). Too short means the wax won’t grip effectively. Too long makes removal more painful trim to 1/4-1/2 inch maximum if necessary. Length matters more than most people realize it’s the number one cause of application failure.
Your Skin: Exfoliate gently 24 hours before (not the day of waxing). Clean skin thoroughly and dry completely moisture prevents proper adhesion. Dust the area with cornstarch or baby powder to absorb any remaining oils. Dry, powder-dusted skin delivers the best possible results.
Your Wax: It should be room temperature to slightly warm with the consistency of honey or thick putty. If too hard, knead it or warm it between your hands. If too soft, refrigerate for 10-15 minutes. Perfect consistency: easy to spread but doesn’t drip.
Step 1: Take a walnut-sized ball of sugar wax and knead it between clean hands for 5-10 seconds. This warms and softens it slightly. Start small you can always add more.
Step 2: Press the ball firmly onto your skin and spread it against the direction of hair growth. Use firm, deliberate pressure to create a 2-3 inch strip. This is opposite of regular wax a crucial difference that makes the technique work.
Step 3: Hold skin taut with one hand. With your other hand, flick the wax off quickly in the direction of hair growth. Stay parallel to the skin rather than pulling up and away from your body. A fast, confident motion works best hesitation makes it hurt more, so commit to the flick.
Step 4: The same piece of wax can be reused multiple times. Hair sticks to the wax as you go simply remove and reapply repeatedly. When the ball becomes covered with hair, discard it and take a fresh piece. One ball can often handle an entire lower leg.
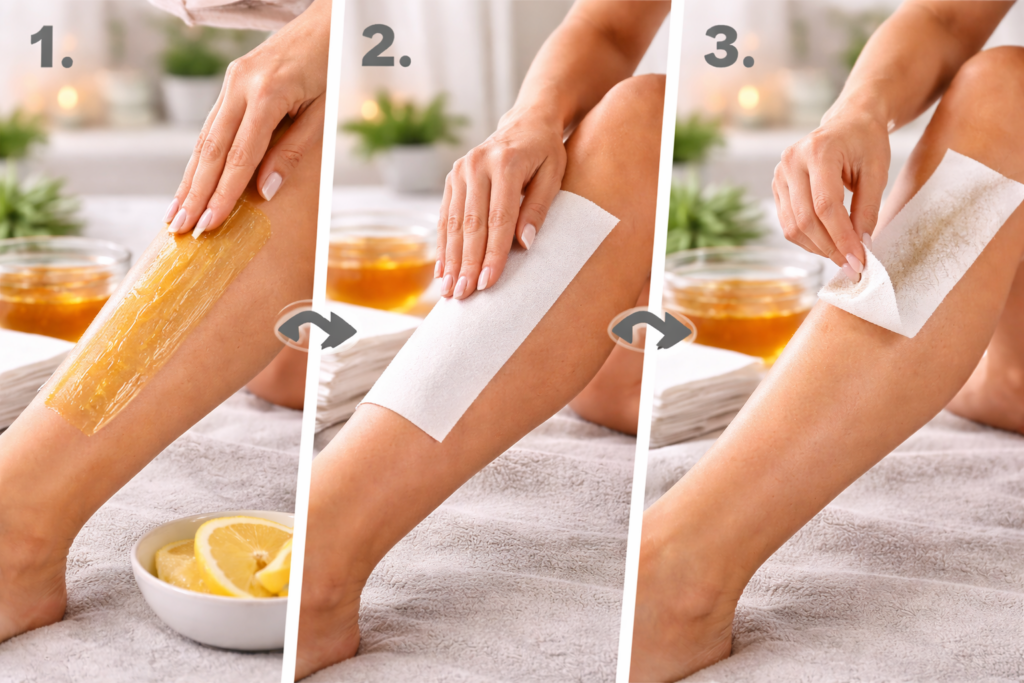
Step 1: Use a popsicle stick or spatula to spread a thin layer against hair growth in 2-3 inch strips. Think of spreading peanut butter consistency.
Step 2: Place a cotton or muslin strip over the wax and press down firmly, smoothing against the growth direction. Leave a small tab at the end for easy gripping.
Step 3: Hold skin taut and pull the strip quickly in the direction of hair growth, staying parallel to the skin. Use that same quick, confident motion.
Always apply against hair growth. Always remove with hair growth. Hold skin taut when removing. Pull parallel to skin, never away from your body. Work in small sections. The same wax piece is reusable until it’s covered with hair. If you miss hairs, wait 24 hours before re-waxing the same spot to prevent irritation.
Pain Management: Press on the area immediately after removal to reduce stinging. Breathe out during the removal motion this reduces pain perception. Don’t wax during your menstrual period when pain sensitivity is higher. Take ibuprofen 30 minutes beforehand if you’re very pain-sensitive. The first time is genuinely the worst it gets easier and less painful with practice.
APPLICATION DIRECTION:
Apply: AGAINST hair growth ↑
Remove: WITH hair growth ↓
(Opposite of regular wax!)
Legs: The easiest area for beginners start here to master technique. Work in sections by dividing each leg into 6-8 manageable areas. Larger pieces of wax work fine here. Either hand or strip method works well. This is your perfect practice area before moving to sensitive zones.
Arms: Similar to legs but hair is often finer and requires less wax. Work the outer arm first, then the inner arm which is slightly more sensitive. Most people find arms only marginally more challenging than legs.
Underarms: Hair grows in multiple directions here this is tricky! Identify the growth pattern carefully before beginning. Apply small sections at a time and be prepared to work in multiple directions for complete coverage. The skin is quite sensitive, so work gently. This is genuinely the most challenging area save it for when you’ve mastered the basic technique.
Bikini Line: Start with just the visible bikini line rather than attempting a full Brazilian. Use smaller pieces of wax for better control. The skin here is very sensitive work slowly and deliberately. Pull skin taut, which is crucial in this area for effective removal. Many people prefer the strip method here for more precise control.
Upper Lip/Face: Use a softer wax consistency by adding extra water to your recipe. Use tiny amounts only. Pull skin taut from the inside of your mouth with your tongue. Very quick removal is essential on facial skin. Test on a less visible area first before tackling your upper lip. Facial skin is delicate use gentle but firm technique.
Eyebrows: Not recommended for DIY unless you’re experienced. Professional shaping is recommended the first time. Reserve at-home sugaring only for maintenance touch-ups between professional appointments. Leave initial eyebrow shaping to professionals.
BODY AREA DIFFICULTY:
START → Legs (easiest)
THEN → Arms
NEXT → Bikini line
ADVANCED → Face, underarms
Practice on legs first!
Problem 1: Wax Too Runny — Cause: Undercooked or too much liquid. Fix: Reheat and cook longer; add 2 tablespoons sugar and re-cook. Prevention: Cook to proper honey color and test in cold water before removing from heat.
Problem 2: Wax Too Hard — Cause: Overcooked. Fix: Reheat with 1-2 tablespoons water and stir thoroughly until smooth. Prevention: Watch color closely and remove at amber, not dark caramel stage.
Problem 3: Wax Won’t Stick to Hair — Cause: Hair too short, skin too moist, or wax at wrong temperature. Fix: Ensure hair is 1/4 inch minimum, dry skin completely, dust with powder. Prevention: Proper prep before starting.
Problem 4: Wax Sticks to Skin, Won’t Come Off — Cause: Wax too soft or warm, applied too thick. Fix: Wash off with warm water; refrigerate wax briefly before trying again. Prevention: Use room-temperature wax and apply in thin layers.
Problem 5: Hair Breaking Instead of Removing — Cause: Pulling in the wrong direction or hair is too long. Fix: Double-check you’re pulling with growth direction; trim excessively long hair first. Prevention: Master technique on a practice area before moving to your entire body.
Problem 6: Wax Crystallized/Grainy — Cause: Sugar crystallization during cooling. Fix: Reheat completely until smooth; avoid stirring while cooling. Prevention: Don’t stir after removing from heat and use completely clean utensils.
Problem 7: Not Removing All Hair — Cause: Technique needs more practice. Fix: Wait 24 hours, then reapply to missed areas. Prevention: Apply firm pressure and remove with a quick, confident motion.
24 Hours Before: Exfoliate gently with a scrub or exfoliating glove to remove dead skin for better wax adhesion. Don’t exfoliate the day of this causes unnecessary sensitivity. The 24-hour window is ideal for preparation.
Immediately Before: Shower or bathe and cleanse the area thoroughly. Dry completely this is a critical step that cannot be skipped. Apply a thin layer of baby powder or cornstarch. Moisture is genuinely the enemy of good wax adhesion.
During Waxing: Keep skin taut when removing wax. Press the area immediately after removal. Work in good lighting so you can see what you’re doing. Take breaks if needed rushing leads to mistakes and missed patches.
Immediately After: Rinse with cool water to soothe the skin. Apply aloe vera gel to reduce any redness. Avoid touching the area with dirty hands. No tight clothing for 2-3 hours while skin calms. The skin is temporarily sensitive treat it accordingly.
24-48 Hours After: Avoid hot baths, saunas, and steam rooms where open pores meet bacteria. No tanning or direct sun exposure on freshly waxed skin. No swimming in chlorinated pools. No heavy exercise where sweat can irritate. Gentle moisturizer is fine after 24 hours. Give skin adequate time to calm and pores to close properly.
Ongoing Maintenance: Exfoliate 2-3 times weekly to prevent ingrown hairs from forming. Moisturize daily to keep skin supple. Re-wax when hair reaches 1/4 inch, typically 3-4 weeks later. Consistent exfoliation is genuinely key to preventing ingrown hairs.
Store your sugar wax in an airtight glass or plastic container at room temperature refrigeration isn’t necessary. The mixture lasts 4-6 months easily at room temperature when kept away from direct sunlight. Sugar is a natural preservative, so the wax doesn’t spoil easily like perishable foods.
Reheating for Reuse: Microwave in 10-15 second intervals, stirring between each to check consistency (beware uneven heating). Stovetop reheating requires low heat with constant stirring until softened. Water bath method is safest place the container in hot water and let it warm gradually. Never overheat you want pliable wax, not liquid.
When to Discard: The wax has changed color significantly and looks very dark. It developed an unusual smell. It became contaminated with dirt or debris. It crystallized beyond repair despite reheating attempts. When in doubt, make a fresh batch ingredients are inexpensive enough to err on the side of caution.
The same batch can be used multiple times across many sessions just reheat to proper consistency when needed. One recipe batch genuinely can last months for personal use, making this an incredibly economical choice for sugar waxing at home.
Q: Does sugar waxing hurt?
A: Yes, but typically less than traditional waxing. Hair is being pulled from the root, which creates unavoidable discomfort, but because sugar wax doesn’t adhere to live skin cells and removes hair in its natural growth direction, it’s genuinely gentler. Pain decreases significantly after the first few sessions as you improve technique and your skin adapts. Taking ibuprofen 30 minutes before and waxing mid-cycle rather than during your period reduces pain sensitivity noticeably.
Q: How long does hair need to be for sugar waxing?
A: Minimum 1/4 inch (approximately the size of a grain of rice). This represents roughly 10-14 days of growth after your last shave. Hair that’s too short won’t be gripped effectively by the wax. If hair is longer than 1/2 inch, trim it first very long hair is significantly more painful to remove and the wax may break the hair instead of removing it cleanly from the root.
Q: Can I sugar wax sensitive areas like bikini line and face?
A: Yes sugar wax is actually ideal for sensitive areas precisely because it doesn’t stick to skin. However, start with less sensitive areas like legs and arms to master the technique before attempting bikini or facial areas. Use a softer wax consistency for facial areas by adding extra water to the recipe. Always patch test on a small area before attempting full bikini or facial waxing.
Q: How long do sugar waxing results last?
A: Typically 3-6 weeks depending on your individual hair growth rate and how consistently you maintain your waxing schedule. Over time with regular sugaring, hair regrowth often reduces and hair grows back noticeably finer. The first session may not last as long because hair growth cycles mean some hair is just beneath the surface. By the third or fourth session, you’ll notice longer-lasting smoothness.
Q: What if my sugar wax won’t harden?
A: Your wax is undercooked. Pour it back into the saucepan and cook for an additional 1-2 minutes, watching carefully for the honey or amber color. Test by dropping a small amount in cold water it should form a soft, pliable ball. If it stays liquid, continue cooking. If it hardens like brittle candy, you’ve overcooked and should start fresh with new ingredients.
Q: Can I sugar wax if I have sensitive skin?
A: Yes sugar waxing is genuinely one of the best methods for sensitive skin because it’s completely natural and doesn’t contain harsh chemicals, fragrances, or resins. For extra sensitivity, omit lemon juice entirely and use only sugar and water, or substitute apple cider vinegar for lemon. Always patch test first and never wax irritated, sunburned, or broken skin regardless of sensitivity level.
Q: How do I remove sugar wax from skin if it gets stuck?
A: Sugar wax is water-soluble, so simply wash the affected area with warm water and it dissolves completely without any struggle. Unlike regular wax that requires oil-based removers and scrubbing, sugar wax cleanup is genuinely easy. If wax is particularly sticky, soak a washcloth in warm water and hold it on the area for 30 seconds before wiping away.
This sugar wax recipe proves that effective, gentle natural hair removal doesn’t require expensive products, salon appointments, or chemical-laden formulas just three simple ingredients and a genuine willingness to learn a new technique with patience. From perfecting the recipe to mastering application across different body areas, you now have everything needed to achieve smooth, fashion-ready skin naturally and affordably at home. Start with your legs to build confidence, practice the technique until it feels natural, and be patient with yourself during the learning curve. Every expert sugar waxer was once a beginner watching their first batch bubble on the stove. With ingredients that cost less than a latte and results that last weeks, sugar waxing is the natural DIY hair removal secret genuinely worth mastering. Your smooth, hair-free, chemical-free skin awaits time to make your first batch!
You will also like the Bleach Bath Before and After.

Kesha Smith is a lifestyle blogger passionate about simple living, healthy habits, and everyday inspiration. On this website, you’ll find